For years, I struggled to make homemade pizza crust that wasn’t dense, tough, or uneven. No matter how carefully I followed recipes, my dough always seemed to fight back when I tried to roll it out, and the baked crust lacked the airy texture I craved. I thought I was doing everything right—measuring ingredients precisely and kneading the dough to perfection—but something was missing.
Then, I discovered the power of letting the dough rest. This one simple step transformed my pizzas, taking them from mediocre to downright irresistible. The crust became light, airy, and full of flavor, with a texture that rivaled my favorite pizzerias.
Resting the dough wasn’t just about improving the texture; it changed the entire pizza-making experience. Now, pizza night feels like a celebration, and the crust is always the star of the show.
Common Problems with Homemade Pizza Crust
When I first started making pizza at home, I encountered several challenges that left me frustrated with the results. Here are the common issues I faced and what I learned along the way:
1. Tough and Chewy Crust
My dough often turned out tough and difficult to chew. I realized this was a result of overworking the dough without giving it time to relax. Overworked gluten leads to a dense, unyielding crust that lacks the lightness of a good pizza base.
2. Dough That Was Hard to Stretch
Trying to stretch my dough into a perfect circle felt like a battle. It would spring back every time I rolled it out, making it impossible to achieve an even shape. This was because I hadn’t allowed the gluten to relax, which is crucial for easy shaping.
3. Uneven Rise
My crusts would sometimes bake unevenly, with some areas puffing up while others stayed flat. This inconsistency was due to inadequate fermentation, which happens when dough isn’t rested long enough for the yeast to work its magic.
4. Bland Flavor
Even when the texture turned out decent, the flavor of my crust often felt underwhelming. I later learned that resting the dough allows fermentation to develop complex, slightly tangy flavors that elevate the entire pizza.
Identifying these problems helped me understand the importance of resting the dough. It wasn’t just an optional step—it was the key to solving all these issues and creating the pizza crust I’d always wanted.
The Science Behind Resting Dough
Resting dough isn’t just a pause in the pizza-making process—it’s a critical step that transforms the dough on a molecular level. Here’s what happens when you let the dough rest and why it’s so essential:
1. Gluten Relaxation
When you knead dough, you develop gluten, which gives the crust its structure and elasticity. However, immediately after kneading, the gluten is tight and tense, making the dough difficult to stretch or roll. Resting allows the gluten to relax, making the dough much easier to work with and ensuring it holds its shape without springing back.
2. Fermentation and Flavor Development
Resting the dough gives the yeast time to ferment. During this process, yeast consumes sugars in the flour and produces carbon dioxide, which creates air pockets that give the crust its light, airy texture. Fermentation also develops complex flavors, adding a slight tanginess and depth to the crust that simply can’t be achieved without resting.
3. Hydration of the Flour
As the dough rests, the flour absorbs water more fully, which improves its consistency and texture. Proper hydration ensures the dough is smooth, pliable, and less sticky, making it easier to handle and shape.
4. Improved Baking Performance
Rested dough rises more evenly in the oven, creating a beautifully puffed crust with just the right balance of crispness and chewiness. The air pockets formed during resting help the crust achieve that perfect texture—light and airy on the inside with a golden, slightly crispy exterior.
Understanding the science behind resting dough completely changed the way I approached pizza-making. It’s not just a step; it’s the foundation for creating a crust that’s as delicious as it is satisfying to make.
My Step-by-Step Dough Resting Process

Perfecting my dough resting process took some experimentation, but I’ve found a method that consistently delivers incredible results. Here’s how I do it:
1. Use the Right Flour and Hydration Ratio
I start with high-protein flour, like bread flour, which has more gluten and creates a better structure for the crust. For hydration, I use a ratio of 60-65% water to flour. This balance ensures the dough is soft and pliable but not too sticky.
2. Knead the Dough Properly
After mixing the ingredients, I knead the dough for about 8-10 minutes until it’s smooth and elastic. This step is crucial for developing gluten, but it’s equally important to stop kneading before the dough becomes too tight.
3. Rest the Dough After Kneading
Once kneaded, I form the dough into a ball, lightly coat it with olive oil to prevent drying, and place it in a bowl covered with a damp cloth or plastic wrap. I let it rest at room temperature for 1-2 hours. During this time, the yeast activates, and the dough begins to rise and soften.
4. Refrigerate for Slow Fermentation
For the best flavor and texture, I let the dough rest in the refrigerator overnight, or even up to 48 hours. This slow fermentation develops complex flavors and creates a more digestible crust. I cover the dough tightly to prevent it from drying out.
5. Bring to Room Temperature Before Shaping
Before shaping the pizza, I let the dough come to room temperature for about 30 minutes. This step makes the dough more elastic and easier to stretch without tearing.
6. Shape and Bake
Once the dough has rested and warmed, I gently stretch it into the desired shape, avoiding rolling pins, which can deflate the air pockets. After adding my favorite toppings, it’s ready to bake in a hot oven (preferably on a preheated pizza stone) until the crust is golden and bubbly.
Following these steps ensures the dough is rested properly, resulting in a crust that’s airy, flavorful, and perfect every time.
Lessons Learned Through Experimentation
Perfecting my dough resting process didn’t happen overnight. Each attempt taught me something new about timing, technique, and flavor. Here are the key lessons I learned along the way:
1. Over-Resting Can Flatten the Dough
At first, I assumed that longer resting times were always better. However, leaving the dough too long at room temperature caused the yeast to over-ferment, resulting in a dough that lacked structure and puff. Now, I stick to 1-2 hours at room temperature and rely on slow refrigeration for extended resting periods.
2. Under-Resting Leads to Tough Crust
When I rushed the process and skipped the resting step, the dough was tough and hard to stretch. It reminded me why resting is non-negotiable—it’s what makes the gluten pliable and easy to work with.
3. Timing Impacts Flavor
Shorter resting times resulted in crusts with mild flavor, while longer fermentation (24-48 hours) created a deep, complex tanginess. Experimenting with timing taught me that patience truly pays off when it comes to flavor development.
4. The Right Temperature Matters
Resting the dough in a warm spot speeds up the process, but it can also cause over-proofing if left unchecked. I found that a slightly cool, stable environment yields more consistent results. Refrigerating the dough overnight became my go-to method for both flavor and texture.
5. Dough Hydration Levels Are Crucial
Playing with the water-to-flour ratio helped me find the sweet spot. A well-hydrated dough bakes into a tender, airy crust, while a drier dough results in a denser texture.
These lessons reshaped the way I approached pizza dough. Understanding the nuances of resting dough not only improved my crusts but also deepened my appreciation for the artistry of pizza-making.
Creative Crust Variations
Once I mastered the art of resting dough, I began experimenting with different ways to make my pizza crusts unique. These variations have added exciting flavors and textures to my pizzas, keeping them fresh and fun for every occasion.
1. Herb-Infused Dough
Adding dried herbs like oregano, basil, or rosemary directly into the dough brings a subtle, aromatic flavor to the crust. For an extra punch, I mix minced garlic into the dough—it pairs perfectly with classic pizza toppings like tomato and mozzarella.
2. Whole-Grain and Gluten-Free Options
Switching to whole-grain flours like spelt or whole wheat adds a nutty depth and makes the crust heartier. For gluten-free friends, I’ve experimented with gluten-free flour blends. While the texture differs slightly, proper hydration and resting still make a big difference.
3. Cheese-Stuffed Crusts
For a crowd-pleasing twist, I’ve created stuffed crusts by folding shredded mozzarella into the edges of the dough before baking. It’s an indulgent option that never fails to impress.
4. Spicy Dough Variations
Mixing a pinch of red pepper flakes or cayenne powder into the dough gives it a subtle heat that complements savory toppings. It’s a fun way to add a little kick to the pizza.
5. Sweet Pizza Bases
For dessert pizzas, I’ve added a touch of sugar and vanilla extract to the dough. Topped with mascarpone, fresh fruit, and a drizzle of honey, it creates a sweet ending to any meal.
6. Flavored Crust Toppings
Brushing the edges of the crust with flavored oils or butter after baking adds a finishing touch. My favorites include garlic butter, olive oil with fresh parsley, or even a sprinkle of Parmesan.
These variations have turned pizza-making into a creative adventure. Whether it’s a casual weeknight dinner or a special occasion, these crust upgrades elevate the entire experience.
A Slice of Perfection
Mastering the art of resting dough has transformed my pizza-making experience. What started as a series of frustrating attempts has evolved into a joyful, creative process that consistently delivers delicious results. By simply allowing the dough to rest, I unlocked the secret to a crust that’s airy, flavorful, and beautifully textured.
Beyond just improving texture and flavor, resting dough taught me patience and the importance of letting ingredients work their magic. It’s a reminder that great cooking often comes down to simple, thoughtful steps.
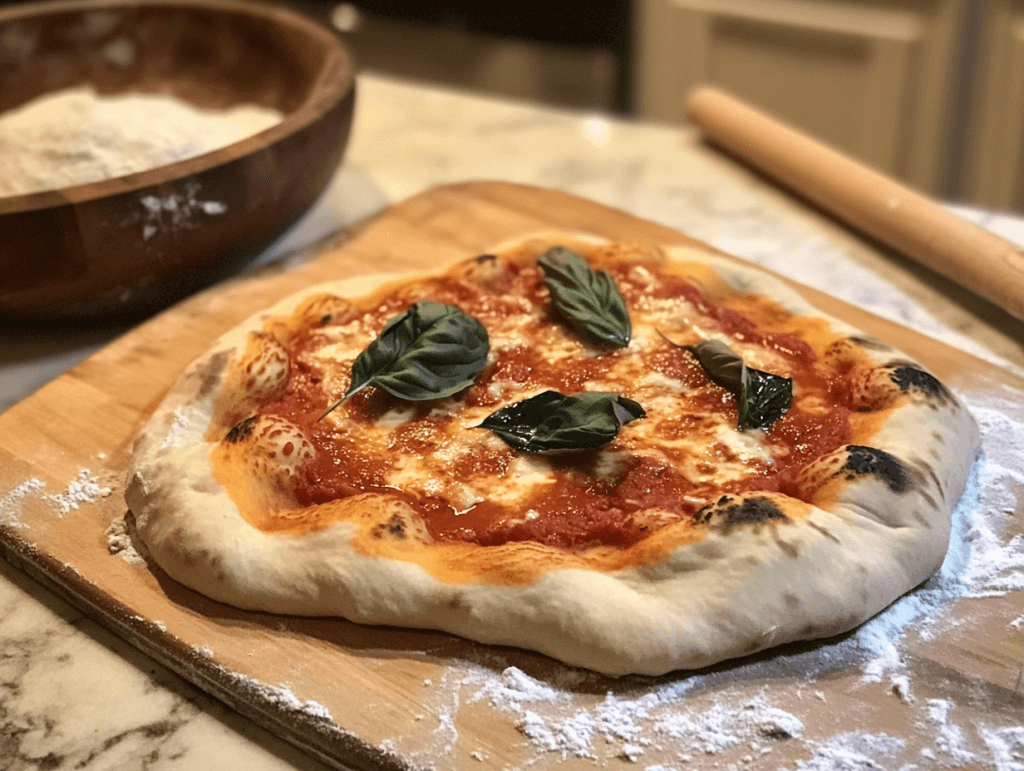
Now, pizza night in my home is a celebration. Whether I’m crafting a classic margherita, experimenting with spicy toppings, or surprising my family with a dessert pizza, the crust always takes center stage.
If you’ve struggled with homemade pizza, give your dough the time it needs. Resting isn’t just a step—it’s the foundation of a perfect slice. Trust me, your taste buds will thank you.


