I used to think searing meat was all about throwing it in a hot pan and hoping for the best. But for years, I struggled to achieve that perfect, golden-brown crust on my meat. I would end up with unevenly cooked meat, a pale, unappetizing exterior, and a lack of depth in flavor. It wasn’t until I took the time to learn the science behind searing and the techniques that go into it that I finally achieved the results I’d been craving.
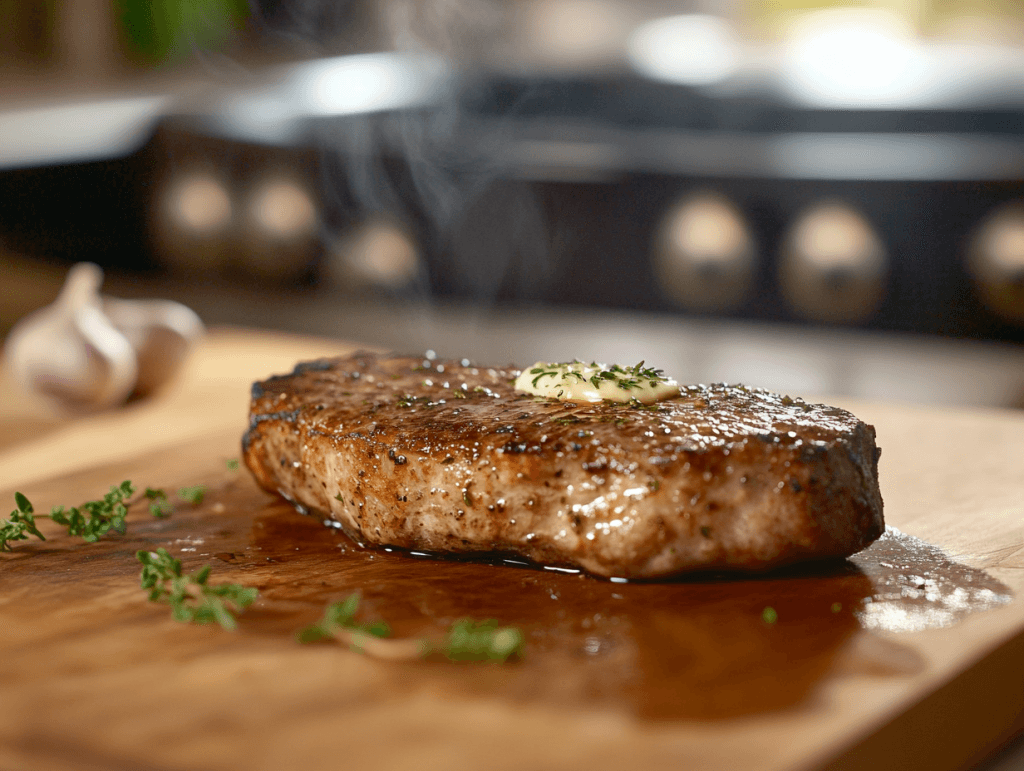
Searing meat is about more than just cooking—it’s about locking in flavor, enhancing texture, and creating that irresistible, crispy crust. The perfect sear can elevate any cut of meat, turning a simple dinner into a restaurant-worthy experience.
I’ll walk you through everything I’ve learned about the art of searing meat, from the science behind it to the best techniques and tips for getting that perfect crust every time.
Why the Perfect Sear Matters
The perfect sear is one of the most important techniques in cooking meat, and for good reason. It’s not just about achieving a beautiful golden-brown crust—there’s science and flavor behind it. Here’s why the perfect sear matters:
1. Flavor Development through the Maillard Reaction
The Maillard reaction is a chemical reaction that occurs when proteins and sugars in meat react to heat. This reaction is responsible for the deep, savory flavor and the golden-brown crust we love in seared meat. It’s the same reaction that gives bread its crispy crust or roasted coffee its rich aroma. The higher the heat, the more intense this reaction, leading to deeper, more complex flavors.
2. Locking in Juices
When meat is seared at a high temperature, the exterior quickly forms a crust, helping to lock in the natural juices and flavors. While the inside continues to cook at a lower temperature, the seared exterior ensures that the meat stays juicy, tender, and flavorful. A good sear prevents the meat from drying out, keeping it succulent with every bite.
3. Enhancing Texture
The perfect sear adds a crunchy, crispy exterior while maintaining a tender interior. This contrast between the crispy crust and the juicy interior is what makes seared meat so satisfying. The texture of the seared meat provides the perfect balance, elevating the overall experience of eating it.
4. Visual Appeal
A perfectly seared piece of meat is visually stunning. That golden-brown crust signals to the cook and diner that the meat has been treated with care and precision. It not only makes the dish look more appetizing but also indicates that the meat has been cooked to the perfect texture and flavor.
Achieving the perfect sear is an art form. It’s about creating the right balance of heat, timing, and technique to ensure the meat’s flavor, texture, and juiciness are at their peak.
The Ideal Cut of Meat for Searing
Not all cuts of meat are created equal when it comes to searing. Some cuts respond better to high heat and benefit the most from that golden-brown crust. Understanding which cuts are best for searing can make all the difference in achieving that perfect result. Here’s a breakdown of the ideal cuts for searing:
1. Steaks (Ribeye, New York Strip, Filet Mignon)
- Why They Work: Steaks like ribeye, New York strip, and filet mignon are perfect for searing because they have the right balance of tenderness, marbling (fat), and thickness. The fat in these cuts helps to create a flavorful crust, while the thickness allows for an even cook on the inside without burning the exterior.
- How to Sear: For these cuts, I recommend searing on high heat for 3-5 minutes per side, depending on thickness. The goal is to create a crispy exterior while maintaining the desired level of doneness inside.
2. Chicken Breasts (Bone-In or Boneless)
- Why They Work: Chicken breasts, especially when bone-in, are fantastic for searing because they cook quickly and evenly when given the right amount of attention. The skin (if left on) crisps up beautifully in a hot pan, adding texture and flavor.
- How to Sear: I prefer to sear chicken breasts skin-side down first, allowing the skin to crisp up. For boneless breasts, 4-5 minutes on each side at medium-high heat usually gives me that perfect sear while keeping the meat juicy and tender. For bone-in, the process may take a little longer, but it’s worth the extra time.
3. Pork Chops (Bone-In or Boneless)
- Why They Work: Pork chops, especially bone-in, are great for searing. The bone helps insulate the meat, making it cook evenly and retain moisture. The fat in pork chops renders nicely, creating that desired crispy exterior.
- How to Sear: I sear pork chops for 4-6 minutes on each side over medium-high heat, ensuring the fat renders and the meat is cooked through. I finish them in the oven if necessary, depending on thickness.
4. Lamb Chops
- Why They Work: Lamb chops are tender and flavorful, with a nice amount of fat for creating a perfect sear. They benefit from quick searing, as the meat cooks relatively quickly and retains its juiciness.
- How to Sear: I sear lamb chops for 3-4 minutes on each side over medium-high heat, allowing the fat to crisp and the meat to reach the desired doneness. Lamb’s unique flavor stands out when it’s seared to perfection.
5. Fish (Salmon, Tuna, or Sea Bass)
- Why They Work: Fish like salmon, tuna, and sea bass are excellent for searing due to their firm texture and ability to form a crispy crust without falling apart. The fat in fish like salmon helps achieve a beautifully crisp skin while keeping the flesh moist and tender.
- How to Sear: I always sear fish with the skin side down first, using a hot pan to get a crispy, golden skin. For thinner fish, 2-3 minutes per side is usually enough, while thicker cuts may need slightly longer to cook through.
6. Duck Breasts
- Why They Work: Duck breasts have a rich, fatty skin that crisps up beautifully when seared. Duck meat is tender and flavorful, and searing helps to lock in the juices while rendering the fat for a crispy texture.
- How to Sear: I recommend scoring the duck skin before searing to allow the fat to render properly. I sear the skin side down for about 6-8 minutes, then flip it over for another 2-3 minutes until it’s golden and crispy.
Thickness and Marbling
When selecting cuts of meat for searing, it’s important to consider both thickness and marbling. Thicker cuts provide more leeway for getting that perfect crust without overcooking the inside. Marbled cuts (those with fat running through them) are particularly good for searing, as the fat helps to develop flavor and create a beautiful crust.
Knowing which cuts of meat are best suited for searing can help you achieve better results and elevate your cooking game. Each cut has its own unique qualities that contribute to the final sear, so choosing the right one is key.
Key Techniques for a Perfect Seared Crust
Now that we’ve discussed the best cuts of meat for searing, let’s dive into the key techniques that ensure you get that perfect, golden-brown crust every time. Mastering these techniques is the difference between a mediocre sear and a restaurant-quality finish. Here’s how I’ve perfected the process:
1. Preheat the Pan
- Why It’s Important: A hot pan is essential for achieving that crispy, caramelized crust. If the pan isn’t hot enough, the meat will stick, and you’ll end up with a soggy exterior instead of a beautiful sear.
- How to Do It: I always preheat my pan on medium-high heat for 3-5 minutes. I use a cast-iron or stainless steel pan for even heat distribution, which ensures a consistent sear. If I’m cooking thicker cuts, I may even raise the heat slightly to ensure the pan is hot enough to create that initial sear when the meat hits the surface.
2. Dry the Meat
- Why It’s Important: Moisture is the enemy of a good sear. Wet meat will steam instead of searing, which results in a pale, soggy crust. Drying the meat helps to ensure it crisps up beautifully and forms that golden-brown exterior.
- How to Do It: Before searing, I pat the meat dry with paper towels, ensuring there’s no moisture left on the surface. This simple step is one of the most important when it comes to getting a perfect sear.
3. Use the Right Oil
- Why It’s Important: The oil you use plays a significant role in achieving the perfect sear. You need an oil with a high smoke point to handle the heat and provide the crispiness you’re looking for.
- How to Do It: I use oils like canola, vegetable, or avocado oil, all of which have high smoke points. I heat the oil in the pan until it shimmers, but it shouldn’t be smoking. If I want to add flavor, I may incorporate a little butter toward the end of the searing process, but I don’t add it too early, as it can burn at high temperatures.
4. Don’t Crowd the Pan
- Why It’s Important: Overcrowding the pan prevents proper searing and can lead to steaming rather than searing. When too much meat is in the pan, the temperature drops, and the meat won’t get that crispy, caramelized exterior.
- How to Do It: I always make sure to leave enough space between each piece of meat in the pan. If necessary, I cook in batches to ensure each piece gets plenty of room to sear.
5. Let the Meat Cook Undisturbed
- Why It’s Important: Once the meat hits the pan, resist the urge to move it around or flip it too early. Let it sit in the pan to form the crust. Moving the meat prematurely can disrupt the searing process and prevent a nice, even crust from forming.
- How to Do It: I let the meat cook on one side for about 3-5 minutes (depending on thickness) without touching it. Once the crust is golden and crisp, I flip it over and allow the other side to sear.
6. Control the Heat
- Why It’s Important: While high heat is essential for searing, you don’t want to overdo it and risk burning the meat. Controlling the heat during the cooking process is crucial for an even, beautiful crust.
- How to Do It: I start with medium-high heat to sear the meat, and once the sear is achieved, I lower the heat slightly to ensure the meat finishes cooking without burning the outside. This balance allows for a perfect crust and properly cooked interior.
7. Use a Meat Thermometer (Optional)
- Why It’s Important: For thicker cuts, especially steaks and chicken, using a meat thermometer ensures the meat is cooked to your desired level of doneness without overcooking it.
- How to Do It: I insert a thermometer into the thickest part of the meat (without touching bone) to monitor its internal temperature. For example, I aim for 130°F (54°C) for medium-rare steak, 165°F (74°C) for chicken, or 140°F (60°C) for pork chops.
8. Rest the Meat
- Why It’s Important: After searing, I always let the meat rest for a few minutes before cutting into it. This allows the juices to redistribute, ensuring that the meat stays tender and juicy.
- How to Do It: I remove the meat from the pan and let it rest for 5-10 minutes. This brief resting period ensures that the juices remain inside the meat, making it more flavorful and moist.
With these techniques in mind, I’ve been able to achieve perfect sears on all types of meat—whether it’s a steak, chicken breast, or pork chop. The result is always the same: a crispy, flavorful crust and a juicy, tender interior.
The Searing Process: Step-by-Step
Now that we’ve covered the key techniques for achieving a perfect sear, let’s go through the searing process step-by-step. These simple, straightforward instructions will guide you to consistently create that golden, crispy crust you crave on all types of meat.
1. Preheat the Pan
- Place your pan on the stove over medium-high heat and allow it to preheat for about 3-5 minutes. The pan should be hot enough that when you add the meat, you hear a sizzle. If you’re using a cast-iron or stainless steel pan, this step is especially important to ensure even heat distribution and an even sear.
2. Dry the Meat
- Pat your meat dry with paper towels. Any moisture on the surface of the meat will interfere with the searing process, so make sure to remove as much water as possible. This step is crucial for getting that perfect crispy crust.
3. Add Oil
- Add a tablespoon or two of oil with a high smoke point (like canola, vegetable, or avocado oil) to the pan. Swirl the oil to coat the bottom of the pan. Let the oil heat up until it shimmers but doesn’t start smoking. If you’re adding butter for flavor, do it at this point, but don’t let it burn.
4. Place the Meat in the Pan
- Carefully place the meat into the hot pan, making sure not to overcrowd the pan. If necessary, sear in batches. Once the meat is in the pan, let it cook undisturbed. Resist the temptation to move it around too soon—let it sit for about 3-5 minutes (depending on thickness) to form the crust.
5. Flip the Meat
- After the first side has developed a golden-brown crust, flip the meat to the other side using tongs. If you’re cooking thicker cuts, you can also sear the sides of the meat by holding it with tongs and pressing it against the pan. This step helps achieve an even sear all around the meat.
6. Lower the Heat (If Necessary)
- Once the sear is achieved, lower the heat slightly to allow the inside of the meat to cook through without burning the exterior. For example, once the steak is seared, I lower the heat to medium to finish cooking it to my desired level of doneness.
7. Check for Doneness
- For thinner cuts of meat, I can rely on the searing time to determine doneness. For thicker cuts, use a meat thermometer to check the internal temperature. Refer to your preferred doneness:
- For medium-rare steak: 130°F (54°C)
- For medium steak: 140°F (60°C)
- For well-done steak: 160°F (71°C)
- For chicken: 165°F (74°C)
- For pork chops: 140°F (60°C)
8. Rest the Meat
- Once the meat is done, remove it from the pan and let it rest for 5-10 minutes. This allows the juices to redistribute, ensuring the meat stays tender and juicy when you cut into it.
By following these steps, you can achieve the perfect sear every time, whether you’re cooking steaks, chicken breasts, pork chops, or even delicate fish. The result is always the same: a golden-brown crust that locks in the flavor and texture, making every bite truly satisfying.
Enhancing Flavor During the Sear
The beauty of searing meat isn’t just in the crust—it’s also in the opportunity to infuse additional flavors into the meat while it cooks. I’ve learned that by adding a few simple ingredients during the searing process, I can elevate the dish to a whole new level. Here’s how I enhance the flavor of meat during the sear:
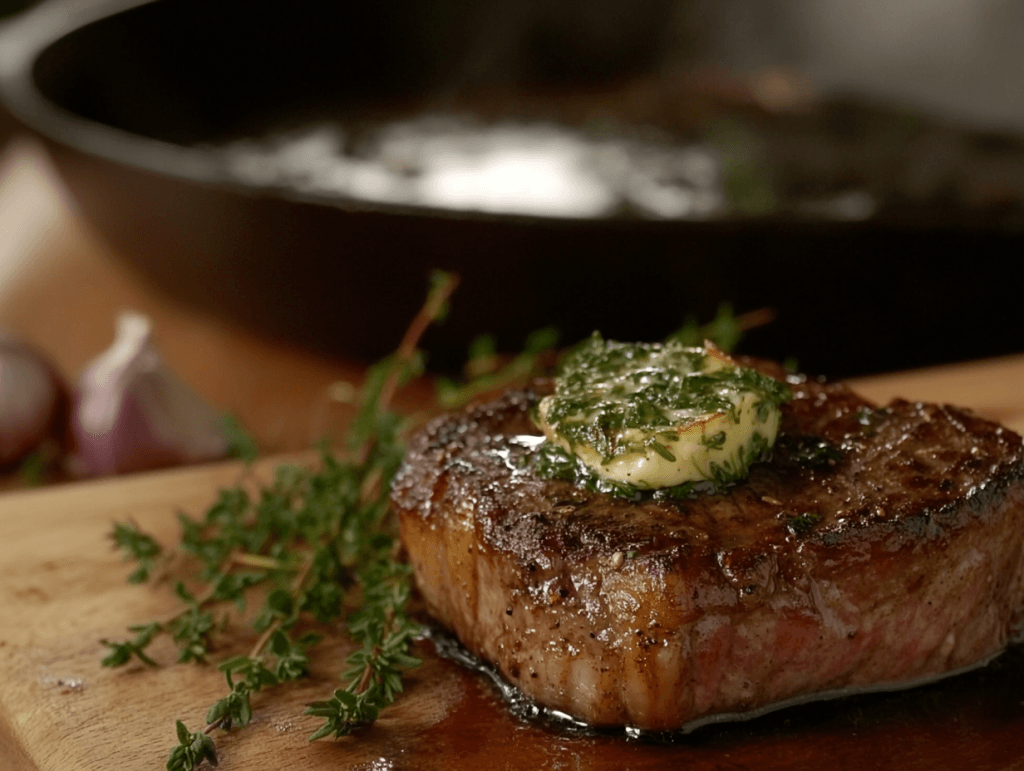
1. Garlic and Herbs
- Why It Works: Garlic and herbs infuse the meat with aromatic flavors as it sears. The high heat of the pan helps release the oils from the garlic and herbs, which then get absorbed into the meat.
- How to Do It: I like to add smashed garlic cloves and a few sprigs of rosemary, thyme, or sage to the pan during the searing process. I make sure to press the garlic into the pan to release its oils. After a minute or two, I gently push the garlic and herbs aside so they don’t burn, but their flavor continues to permeate the meat.
2. Basting with Butter
- Why It Works: Basting the meat with butter adds richness, moisture, and additional flavor. The butter also helps the meat develop an even more beautiful golden-brown crust.
- How to Do It: Once the meat has seared on one side and I’ve flipped it, I add a tablespoon or two of unsalted butter to the pan. As it melts, I tilt the pan and use a spoon to baste the meat with the melted butter, spooning it over the top of the meat repeatedly. This helps to enhance the flavor and keep the meat juicy. I sometimes add a few more garlic cloves and herbs to the butter for extra flavor during basting.
3. Adding Acidity
- Why It Works: Acidity from ingredients like lemon juice or vinegar brightens the flavors of the meat and balances out the richness, making the dish feel more rounded.
- How to Do It: After searing, I like to deglaze the pan with a splash of wine, stock, or vinegar. This lifts any flavorful bits of caramelized meat from the pan, creating a delicious sauce that I can pour over the meat. A squeeze of fresh lemon juice at the end can also add a burst of freshness.
4. Spices and Seasoning
- Why It Works: Adding spices like smoked paprika, cumin, or chili flakes during the sear helps to develop deeper, more complex flavors. The heat of the pan releases the essential oils in the spices, enhancing their impact.
- How to Do It: I often sprinkle a pinch of spices like smoked paprika or chili flakes over the meat right before I place it in the pan. The spices cook into the surface, forming part of the flavorful crust. I also adjust the seasoning with a little salt and freshly ground black pepper while the meat cooks, making sure every bite is perfectly seasoned.
5. Pan Sauces and Glazes
- Why It Works: After the meat has been seared, you can use the flavorful bits left in the pan to create a rich sauce or glaze. This adds another layer of flavor and ensures that nothing goes to waste.
- How to Do It: After removing the meat from the pan, I deglaze the pan with wine, stock, or cream, scraping up all the fond (those flavorful browned bits) from the bottom of the pan. I simmer it down to create a simple pan sauce. I may add a little butter or heavy cream for richness, or fresh herbs for extra flavor. This sauce can be poured over the seared meat, enhancing the flavor and bringing it all together.
By incorporating these simple flavor-enhancing techniques, you can take your seared meat from delicious to extraordinary. The combination of aromatics, butter, spices, and acidity will transform the meat and the crust, ensuring every bite is packed with flavor.
Lessons Learned from My Searing Journey
Mastering the art of searing meat was a journey of trial, error, and improvement. Over the years, I’ve made my fair share of mistakes, but each one taught me valuable lessons that shaped the way I cook today. Here’s what I’ve learned from my searing journey:
1. High Heat Is Non-Negotiable
One of the first mistakes I made was thinking I could get away with lower heat, hoping the meat would cook evenly without burning. I quickly learned that high heat is essential for a perfect sear. Without it, you end up with a gray, unappetizing crust instead of that golden-brown beauty we all crave. Preheating the pan and using the right oil are key to achieving that perfect sear.
2. Patience Is Key
In the early days, I was impatient, flipping the meat too soon and moving it around too much. I wanted to speed up the process, but I realized that searing meat is about patience. Let the meat rest undisturbed in the pan to allow the Maillard reaction to occur. This is when the magic happens, and rushing it only results in missed flavor.
3. Don’t Overcrowd the Pan
Overcrowding the pan was another mistake I made early on. I thought I could sear multiple pieces of meat at once, but I soon discovered that it’s better to cook in batches. Overcrowding reduces the heat in the pan and leads to steaming instead of searing, which is the opposite of what I wanted. I now always make sure there’s enough space in the pan for each piece to get a proper sear.
4. Searing Isn’t Just for Steaks
While I initially focused only on steaks, I’ve learned that searing is applicable to many types of meat, from chicken and pork to lamb and fish. Each protein has its own unique needs, but the fundamentals of a good sear remain the same. For example, I now regularly sear chicken breasts and lamb chops, achieving the same golden crust I once reserved for steaks.
5. Searing Is About Texture and Flavor
In the beginning, I thought searing was only about appearance. But as I gained experience, I realized that searing is just as much about texture and flavor. The crispy, caramelized crust not only adds texture but also locks in moisture, making the meat juicier. The depth of flavor that comes from a good sear enhances the overall dish, turning simple meat into something truly special.
6. The Importance of Resting the Meat
Resting meat after searing was something I overlooked early on. I’d cut into my steaks or chicken immediately after removing them from the pan, and I’d wonder why they were dry. Allowing the meat to rest for a few minutes after searing helps the juices redistribute, making the meat more tender and flavorful. I’ve since made resting a non-negotiable part of the process.
7. Experimenting with Basting Makes a Difference
When I first started basting meat with butter and herbs, I was blown away by how much it elevated the dish. The richness of the butter, combined with garlic and herbs, infuses the meat with even more flavor. It’s a simple step that can make a huge difference in both the flavor and the texture of the meat, and now I always make time for it during the searing process.
8. The Right Tools Make All the Difference
I used to try to sear meat with whatever tools I had on hand, not realizing that the right equipment makes the process much easier. A good cast-iron or stainless steel skillet is essential for even heat distribution and achieving that perfect crust. I also learned the importance of using tongs rather than a fork, so I don’t puncture the meat and let the juices escape.
Mastering searing took time and practice, but these lessons have completely transformed my cooking. Now, I approach each piece of meat with confidence, knowing exactly how to achieve that perfect crust every time. The journey from being unsure about searing to now feeling like a pro has been incredibly rewarding.
My Favorite Seared Meat Recipes
After mastering the art of searing, I’ve developed a few go-to recipes that highlight the beauty of a perfectly seared piece of meat. These recipes are simple yet elegant, allowing the sear to shine and create a delicious, restaurant-quality meal at home. Here are my favorites:
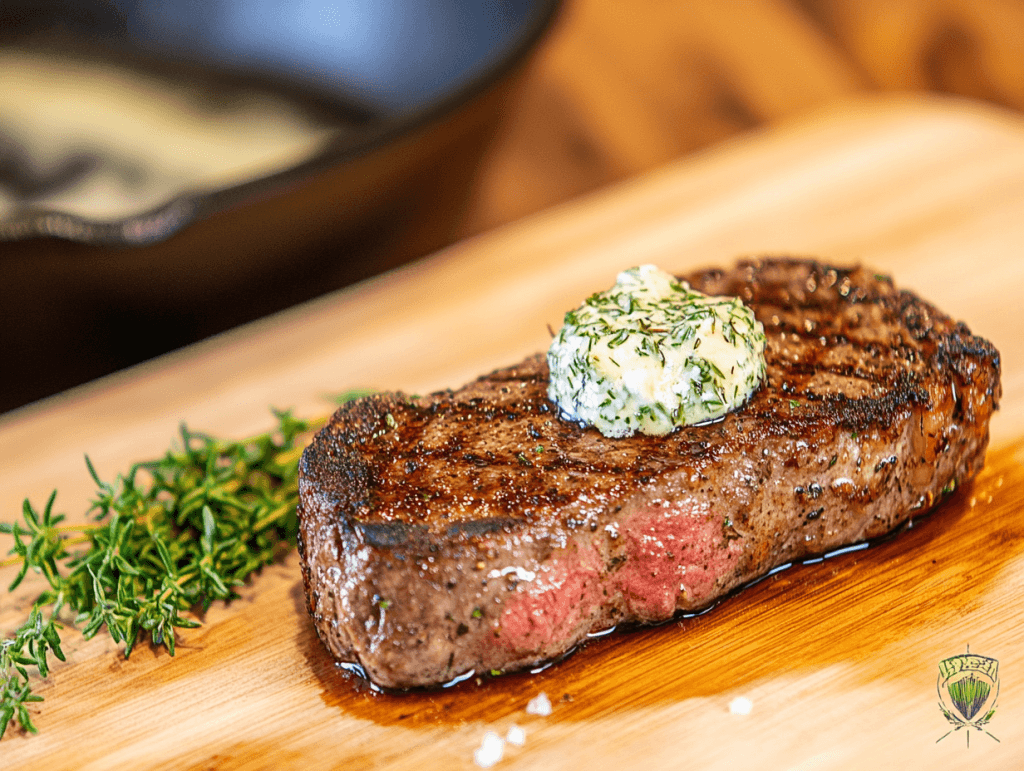
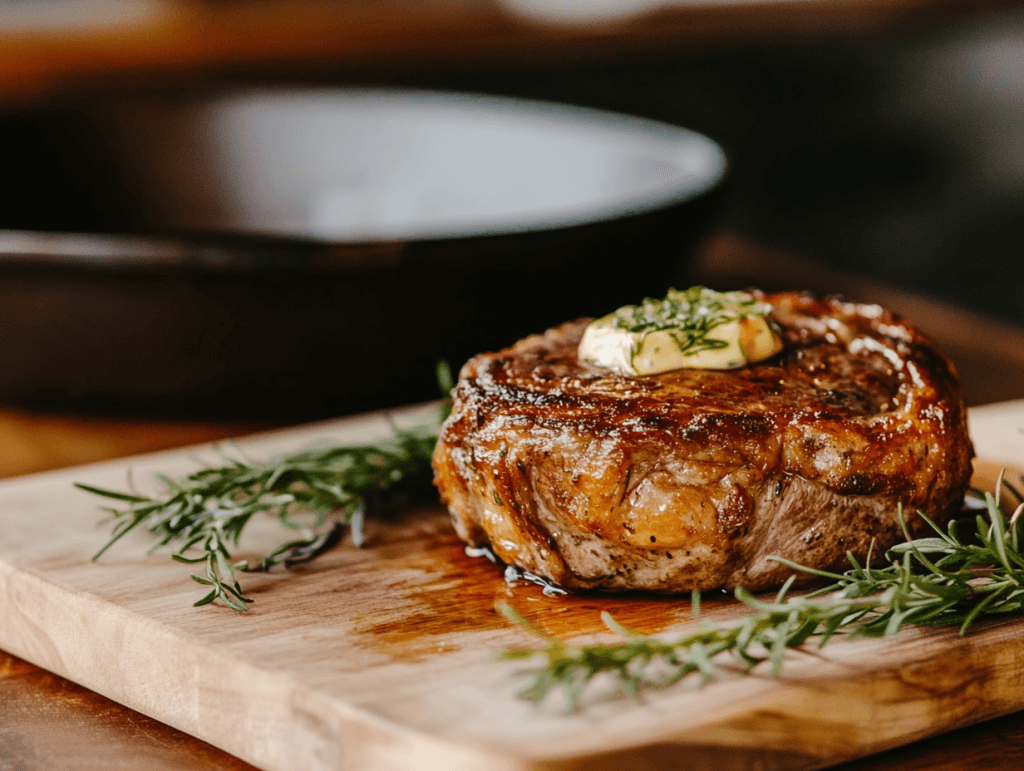
1. Perfectly Seared Ribeye Steak with Herb Butter
- Ingredients:
- 2 ribeye steaks, about 1-inch thick
- 1 tablespoon olive oil
- 2 tablespoons unsalted butter
- 2 garlic cloves, smashed
- 2 sprigs fresh rosemary or thyme
- Salt and freshly ground black pepper
- Method:
- Preheat a cast-iron skillet over medium-high heat for 3-5 minutes.
- Pat the steaks dry with paper towels and season generously with salt and pepper.
- Add olive oil to the pan and allow it to heat until it shimmers.
- Place the steaks in the pan and sear without moving them for 3-5 minutes on each side, depending on your desired doneness.
- During the last minute of searing, add butter, garlic, and herbs to the pan, then baste the steaks with the melted butter.
- Remove the steaks from the pan and let them rest for 5-10 minutes before serving.
- Why It Works: The ribeye steak is marbled with fat, which helps create that rich, flavorful sear. The herb butter adds an extra layer of richness that complements the savory crust of the steak.
2. Seared Chicken Breast with Lemon and Thyme
- Ingredients:
- 2 boneless, skinless chicken breasts
- 2 tablespoons olive oil
- 1 tablespoon butter
- 2 garlic cloves, minced
- 1 sprig fresh thyme
- Juice of 1 lemon
- Salt and pepper to taste
- Method:
- Preheat a skillet over medium-high heat.
- Pat the chicken breasts dry and season generously with salt and pepper.
- Add olive oil to the pan and heat until shimmering.
- Place the chicken in the pan and sear for 4-5 minutes on each side until golden and cooked through.
- Add butter, garlic, and thyme to the pan during the last minute of cooking. Let the butter melt and baste the chicken with it.
- Squeeze lemon juice over the chicken before serving.
- Why It Works: The high heat creates a crispy crust on the chicken, while the butter and fresh thyme add a fragrant, savory richness. The lemon juice cuts through the richness, brightening the flavors.
3. Seared Pork Chops with Apple Cider Glaze
- Ingredients:
- 2 bone-in pork chops
- 1 tablespoon olive oil
- 1/2 cup apple cider
- 1 tablespoon Dijon mustard
- 1 tablespoon honey
- Salt and pepper to taste
- Method:
- Preheat a pan over medium-high heat and add olive oil.
- Pat the pork chops dry and season with salt and pepper.
- Sear the pork chops in the pan for 4-5 minutes on each side until golden and cooked through.
- Remove the pork chops from the pan and set them aside to rest.
- Add apple cider, Dijon mustard, and honey to the pan, scraping up any browned bits from the bottom.
- Simmer the sauce for 3-5 minutes until it thickens slightly, then drizzle over the rested pork chops.
- Why It Works: The seared pork chops have a beautiful, crispy exterior, while the apple cider glaze adds a sweet and tangy contrast that complements the richness of the meat.
4. Seared Salmon with Garlic Herb Sauce
- Ingredients:
- 2 salmon fillets, skin on
- 1 tablespoon olive oil
- 2 tablespoons butter
- 2 garlic cloves, minced
- 1 tablespoon fresh parsley, chopped
- Juice of 1/2 lemon
- Salt and pepper to taste
- Method:
- Preheat a skillet over medium-high heat and add olive oil.
- Season the salmon fillets with salt and pepper.
- Place the salmon fillets skin-side down and sear for 4-5 minutes until the skin is crispy and golden.
- Flip the salmon and cook for another 2-3 minutes until the fish is cooked through but still moist.
- Add butter, garlic, and parsley to the pan during the last minute of cooking. Baste the salmon with the garlic butter sauce before serving.
- Why It Works: The skin crisps up beautifully during searing, and the garlic herb butter adds a rich, savory element that enhances the delicate flavor of the salmon. The lemon juice at the end brightens everything up.
5. Seared Lamb Chops with Mint Yogurt Sauce
- Ingredients:
- 4 lamb chops, bone-in
- 2 tablespoons olive oil
- 1/2 cup plain yogurt
- 1 tablespoon fresh mint, chopped
- 1 tablespoon lemon juice
- 1 garlic clove, minced
- Salt and pepper to taste
- Method:
- Preheat a skillet over medium-high heat and add olive oil.
- Season the lamb chops with salt and pepper.
- Sear the lamb chops for 3-4 minutes on each side until they reach your desired level of doneness.
- In a small bowl, mix the yogurt, mint, lemon juice, and garlic to create the sauce.
- Serve the lamb chops with a generous spoonful of mint yogurt sauce on top.
- Why It Works: The seared lamb chops have a crisp, flavorful crust, while the mint yogurt sauce provides a refreshing contrast that complements the richness of the lamb.
These recipes showcase the art of searing and how it can elevate any cut of meat, from steaks to fish. The crispy exterior and juicy interior make each of these dishes a standout, and they’re easy to replicate at home with just a few simple techniques.
A Perfectly Seared Conclusion
Mastering the art of searing meat has not only enhanced my cooking but completely transformed the way I approach cooking in general. What started as a struggle to achieve that perfect crust has turned into a reliable and rewarding technique that I now use to elevate all types of meat. Whether I’m cooking a juicy steak, tender chicken breast, or flavorful lamb chops, the right sear is the secret to creating that irresistible texture and flavor.
From learning the importance of high heat to experimenting with flavors during the sear, I’ve gained a deeper appreciation for the process. And as I continue to experiment, the sear has become not just a cooking technique but an art form—one that elevates any dish and makes it truly special.
The perfect sear is about more than just a golden-brown crust—it’s about unlocking the full potential of the meat’s flavor, texture, and juiciness. With the right techniques, anyone can master it and create restaurant-quality dishes at home.
As you continue your own journey with searing, I encourage you to experiment with different meats, seasonings, and flavor enhancements. The possibilities are endless, and with each sear, you’ll unlock new levels of deliciousness.